THE ART OF THE CLOSE-UP
One thing that separates me from the other photographers in my area is the client experience I offer. We go places, plan setups, and use creative and exotic outfits and secret locations. We shoot with cars, horses, pets, guitars, guns, buildings, bridges and friends. But when we sit down with Mom and Dad to order, you know what they buy? Close-ups. The ones that show all of that beauty, the expressions, the smile they invested so much in, the sparkle, uniqueness and joy. This month, I show you how I incorporate close-ups with every outfit and location I shoot.
Lighting Is Everything
I don’t understand when I see some BTS shots and the OCF is 15 to 20 feet away from the subject. You wouldn’t put it that far away in the studio, so why would you outside? I use a Elinchron ELB400 and an RotoLight Nano11 for my OCF photographs. It is usually set at 1/32 to 1/256th power. A beauty dish is most effective when it is close. The light is rarely more than 5 feet from their face. It is so close that I am always removing the feet of the stand from the image in post. I keep the modifier close and the power soft so the lighting doesn’t look like flash. It just looks perfect. The outdoor photos in this article are taken that way.
Look Down. Eyes at Me. Smile.
These three directions are how I begin every shoot with a first-time client. The young lady has seen my Instagram with all the great photos of the gorgeous girls I work with, and she walks into my studio gallery to find 100 more on my walls. She is nervous, self-conscious and maybe intimidated. She might be thinking, “Sure, you can take great photos of all of those beautiful people—but not me.”
We need to prove to them that we are the expert. It is our job to help them through it and to enable them see themselves the way everyone who loves them does: flawless, unique and beautiful. The sooner they have confidence in me, the better the session will go. So I choose a spot or setup that I know will get the first three shots perfect. I say, “Drop your chin and look down.” Click. “Lift your eyes to me.” Click. “Smile.” Click. Then I show them the photos. They see their face with their perfect makeup, looking down with their eyes almost closed. They are already envisioning that shot as their new profile pic. Then they see the next one with their eyes so big, and realize they don’t have an RBF after all.
When they see the smile shot, they know that Mom is going to love it. Sometimes I show Mom the three images before I show them to my senior to increase the anticipation. You have them at that point. Find a way to prove to your client they are in good hands. If the first three shots look that good, the rest will be a breeze.
Looking Away
Every teen follows fashion bloggers. The blogger posts lots of shots of her not making eye contact or looking as if she is talking with someone just out of the picture. Let’s take it one step further. We have perfect light and editing, so we get that feel, but better. I show them what I’m looking for. The first thing they do when you ask them to look away is to turn their eyes—which makes for a bad look, without whites on both sides of their iris.
I tell them, “Point your nose in the direction I want you to look and keep your eyes centered on your face.” Then I show them the difference by turning my eyes way to one side. They laugh and they now get the concept. I have them follow my hand until they have it down.
Then I can say, “Look at my hand” or, “Look at that sign across the street” to get them to turn their face. I give constant reinforcement so they know when they are doing it right. As you guide them in the pose, you are reinforcing the belief that you are the best at what you do. I show them the back of the camera frequently in the beginning to show that I am doing it right. Show them a shot where they did it wrong and then the shot where you corrected them, and they won’t make that mistake again. Ever.
The next step is to get them to laugh or smile when looking away. They will think it’s awkward at first and start to laugh for real. That’s when I say, “Eyes at me” and get that genuine smile shot.
Focal Lengths Matter
For years, my go-to lens has been the 70–200mm for its versatility, bokeh and ease of use. When I’m shooting a nervous senior, the zoom allows me to get close without them knowing. I get perfect proportions and zero distortion at that length. Shooting at 70mm allows me to get close enough to frame it the way I need to in tight spots. There is a slight distortion straight out of the camera, but it’s negligible. Recently I started using my 24–70mm for close-ups. Shooting at 35mm can be flattering for heavy people and downright awesome for lighter people. It produces an editorial feel for a change of pace, which clients love. But since I switched to Olympus and Olympus glass, I love my 60mm f/1.8 lens. It has perfect proportions with zero distortion.
The Crop
Ninety percent of the time, I frame the shot exactly the way I want it. That’s how my eye works. But with today’s 24–42K sensors and the great eye focus technology, you aren’t limited to the shot you take. Sometimes the perfect close-up shows itself during editing.
Point of View
Changing the point of view changes things up a little in their photo album, but it’s also a mental trigger. Graduation is a sentimental time for Mom and Dad. A shot looking up at their child can remind them of the day she took her first steps, realized she could read, was saying she was sorry; that time your teenager looked up from her phone and said, “I love you” when you brought home Taco Bell for dinner. Get some shots looking down at them. I like short lenses for this. Keep the light coming from a flattering direction above her. The catchlights should still be above her pupils.
Remember the Hand Rules
Hands should celebrate the face. They should draw attention to the eyes and facial expression. The back of the hand is almost as big as the face, so keep the edges of their hands facing the camera. I like pinky side out. Keep their fingers long and elegant, not too stiff and never curled in a claw. I push their hands into their hair a little to hide them. I don’t want their fingers touching the back of their neck as if they have a migraine. Their forearm shouldn’t be pointing at the camera, especially if you are shooting 50mm or shorter. For ladies, no fist under the chin. Think class, daintiness, sophistication. Hands are usually a couple shades lighter than the face. So when you’re setting the light source, be sure their hand is not perpendicular to it.
Hats Are Great Props
They are fun and different and add personal flare . Whether it is a wide-brim hat, a slouch beanie or a worn-out ball cap, it will change the feel of the photograph. The most critical thing to remember when using a hat is the light source or placement. You don’t want a shadow to go through their eyes or hide them altogether. The light needs to be set under the brim of the hat without shining up on their face. Just above eye level works best. Have them wear the hat a little higher on their forehead. The hat can also be used to conceal. Hiding one eye or both eyes with the brim of the hat makes for a killer fashion look.
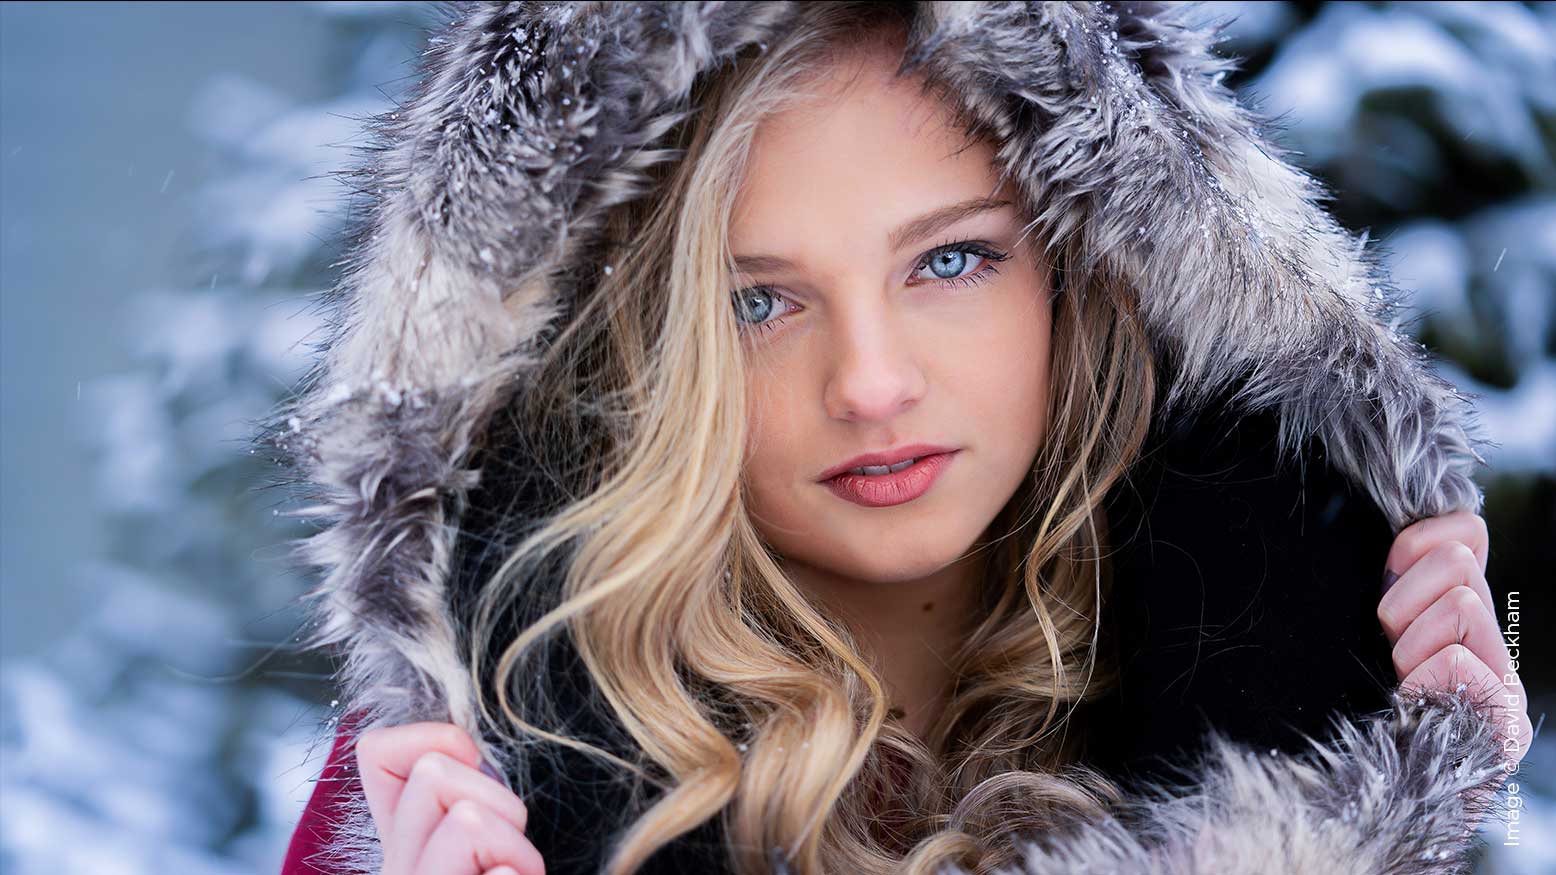
Hoods Are the Best
I like fuzzy hoods, hoodie hoods, lace hoods and raincoat hoods. Pull their hair through the hood so you can see that too. Turn their head inside the hood so only part of their face can be seen.
The Best £22 I Ever Spent
I found this fuzzy infinity scarf at Primark four years ago. I have photographed over 100 girls in it. This scarf is on a dozen walls and in 25 or more albums. It has been used in hundreds of Instagram, VSCO, Facebook and Twitter posts. I like to use it more like a hood than a scarf. The best shots I have taken have their face buried inside the scarf a little. Be aware of the shadows when using OCF. Sometimes I hide their mouth or one of their eyes for a dramatic look. Keep their hands and fingers hidden as much as possible so you don’t draw attention away from their eyes.
Lying Down
If they are on their tummy, it is easy. Their hands and arms can form triangles or leading lines, or they can conceal parts of their face to draw more attention to the features that are exposed. Remember some hand posing rules: no right angles in the wrist; we want soft curves and flowing leading lines. Control their hair and place it intentionally. There is nothing worse than missing a few strands because we were so excited to get the shot that we missed some details.
When they are lying on their back, it is a little harder. This position illuminates the line between senior and sexy. That line is blurry. I rarely pose them on their back. The most critical aspect is the lighting. Design the light so it’s similar to the 5 p.m. sun when they are standing. We want to avoid up shadows on their face.
Let Them Be Goofy
It’s fun to loosen them up, even if none of the photos of the loosening-up exercise are used. Put great light on them before you start just in case they choose one. Have fun with all of these options. Practice them with your model team. Pay attention to the details and watch your sales climb.


Comments
Post a Comment